Pages

Showing posts with label DIY. Show all posts

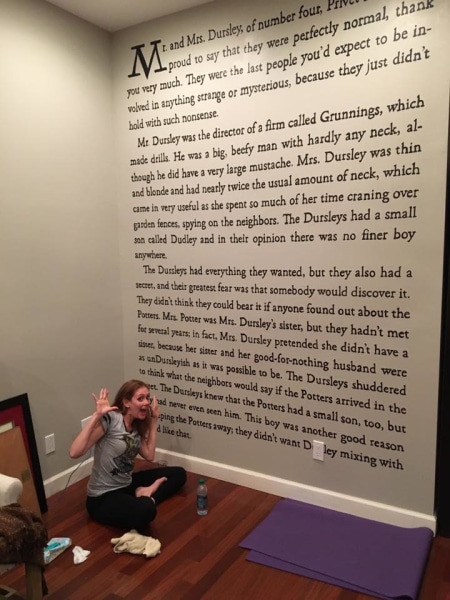
Put a page of your favourite book on your wall

Inspired by a Facebook post this morning about painting words on a wall, I fell into a rabbit hole of "research" and just had to share these images with you. I've seen images of words or text on canvas or framed but you don't get to see full-scale ones like these too often. I prefer the tidy black-and-white ones that make it look like real writing or printed text without the flourishes that some wall decals have.

What words would you paint on a wall?

This first one is amazing. And not just because it is Harry Potter. Click the image to read the full story.

\

This (below) isn't paint but fabric!


And from the beautiful A Beautiful Mess, here's Elsie's room
Hand painted bedroom wall (A Beautiful Mess)

be thou my vision....Lyrics as a mural. She hand drew them then projected them and used black paint pens on white wall.


How's this for placement?

Typography, words on a wall or info graphic, leading the journey through the environment.


And of course, can Pride and Prejudice be left behind? Here's Darcy's first proposal to Elizabeth. So good.

Image result for writing on the wall


I hope you're inspired today! Any favourites? 

Home Office / Studio Decor Inspiration

I'm in the (never-ending) process of redecorating a slip of a room as my office/studio. This room is part of our wrap-around verandah and received a fresh coat of yummy mango-yellow paint recently. I stripped the junk out of the room and right now, it has just the bare essentials - a table, two filing cabinets stuffed with magazines, two thin tall antique cupboards with 'stuff' and a thin single bed, formerly used as a doctor's bed. As you can tell, there's not much room for 'junk' so I'm studiously avoiding getting any in while I figure out storage. Three colourful trunks hold stationery and old notebooks. I'm hoping to use this room as a space to spread out my paints and canvases (in storage since we packed up our lives in the UK six years ago - shame!) and allow me and the boy to paint our afternoons away. Goa is wonderful for languid pipe-dreams and doing up this hot sunny room is one of mine.

Here are some inspirational images for this home-office/art studio/playroom/hideaway. Some of it is contemporary, some traditional.

hearthomemag.co.uk Issue 4 Miss Poirot by hearthomemag, via Flickr

Home of Bart Haverkamp and Pieter Croes

A good look for the tall cupboards in the study?

desk love. via design sponge

office

(Bookshelf for books and art supplies in my study?)

Dream on, baby.

All images via my imaginary-home wishlist board

How to make a notebook from a paper bag

There you go – an excellent way to recycle all those lovely paper bags you’ve been hoarding (don’t deny it). Click on the image to go to the simple tutorial.

The House That Lars Built.: 5 minute bookbinding

via The House that Lars Built

It’s in the details

This leaf imprint on the floor of Architect Ken Meffan’s home caught my eye. What a clever thing to do. You could imprint anything on a floor waiting to dry – bits from nature, a toy, your initials.

I would put in my son’s footprint.

If you could do this in your home, what would you choose?

See more of this lovely home here.

Use what you’ve got: Bottles

decorating with Vintage bottles

via

Do you have a collection of vintage bottles lying around your house? I thought not. In India, we don’t exactly have flea markets and car boot sales to tempt us with pretty but useless bits of glass so we must make do with what we’ve got. Which really is beer bottles and stumpy, yet fun Amul lassi bottles.

You see, any space can be prettified with clean glassware. And decorating with a collection makes it even nicer. Here are some ideas to steal.

1. Use them as vases. The trick is to group them together or use one for a single gorgeous bloom.

<3 this floral arrangement in vintage bottles with tea-light candles behind

2. Use them as candle stands

wine bottle candles

3. Use them as jewellery displays

Vintage bottle jewelry display! There are so many neat vintage bottle shapes and colours this could be so neat! If your ever in strathroy Ontario the Strathroy Antique Mall always has bottles for great prices! Sometimes only $1-2! Strathroyantiquemall.com plus follow them on Facebook!

4. Wrap them with twine and disguise them!

upcycled glass bottles! I think this would be cute for a rustic wedding center pieces. You could even mix and match with mason jars too.

5. Make a sea glass mobile

sea glass mobiles:  Now I need to find enough sea glass to make this.  I'm wondering how hard it is to put small holes in each piece of sea glass.  Which kind of drill would you use?

6. Turn a bottle into a soap dispenser

Turn an old whiskey bottle into a soap dispenser. I 19 Totally Ingenious Ways To Use Empty Food And Drink Containers

5 quick upgrades for your stationery drawer

stationery

What does your stationery drawer look? Is it a jumble of pens and pins? Or is it neatly arranged (like mine, ahem), a place for everything so that even the five year old can locate cello tape or a paper clip if I ask him to?

Whether you’re messy or super-organised, here are five upgrades that you can do today to make your stationery drawer a happier, calmer place. And you know what they say, if your stationery is sorted, so is your life. (I made that up, by the way.)

1. Paint your staples gold

A paint pen can change your staples for those special items.

Do they sell gold staples in stores? I have no idea, but this looks like such a great DIY. I did try this once, but the gold pen I had made the staples look like weak soup leftovers. Maybe you’ll have better luck!

2. Turn your earrings into drawing pins

convert cheap earrings into drawing pins!

You know you have them in your jewellery box –those orphaned earrings whose companion has been lost or broken or gone awol. Use those earrings as custom drawing pins and you’ll have your own unique touch on your bulletin board. I’ve done this and it is such fun to see a pearl earring here and a sparkling diamond (fake, of course) there. Can’t wait to lose more earrings!

3. Control those art materials with loo rolls

Great idea to add all those loo rolls!

If your art materials or pens/pencils are out of control, try this nifty trick to get them in line. Stack a shoe box with loo rolls (you save them, don’t you?) and then arrange your writing/colouring implements in them. Sort them out by colour or use – no one is coming to check. Just keep them orderly!

4. Use cereal boxes to organise your stuff

Cereal boxes

The lazy girl’s guide to staying organised includes this wonderful tip. Cut the bases of cereal boxes and arrange them to fit your drawer. Put your stationery in it and you’ll never rummage again. I do this with crayons and smaller art stuff – just cut the boxes as high as you need them.

If you have more time and if backgrounds matter to you, cover the boxes with colourful wrapping paper. This is a good way to use up scraps of paper lying around that you may not have the heart to throw out.

DIY Cereal Box Drawer Dividers.

5.Use glass jars to prettify your desk

If you have little kids, use this one wisely. I love glass jars for storing and displaying things especially crayons, art materials and pencils. Don’t these look great?

Cute way to store markers, crayons, and chalk. If they are plastic, they are also kid friendly. Much nicer looking than ugly,tearing, card board boxes...

or use smaller jars for your desk or in your stationery drawer if it is deep enough

Contain Office Supplies in Glass Jars<br />For a clean, fresh look, use clear jars (and glasses) of various heights and shapes to hold office or sewing supplies.<br />

Find anything useful here?  Do you have any favourite tips for keeping stationery and office supplies under control?

DIY : Make a book with a single piece of paper

I’m obsessed with notebooks so it is only natural that I should want to make my own. From multi-pages to single-sheet DIY notebooks, there’s something thrilling about writing in a book you’ve made yourself.

If you’re new to bookmaking, try this super-simple one sheet book (click image to see tutorial). I make several of these at a time. The 5 yo and I have been busy conjuring up stories and writing/drawing them into these books. Great fun and these make wonderful memories too.

How to make a book with a single piece of paper

Image via

And here are some of ours:

image

I have a Bookmaking Board on Pinterest, if you’d like to follow along on this adventure. Do you make your own books? Share them with us!

Katharine Watson :Block printed cards

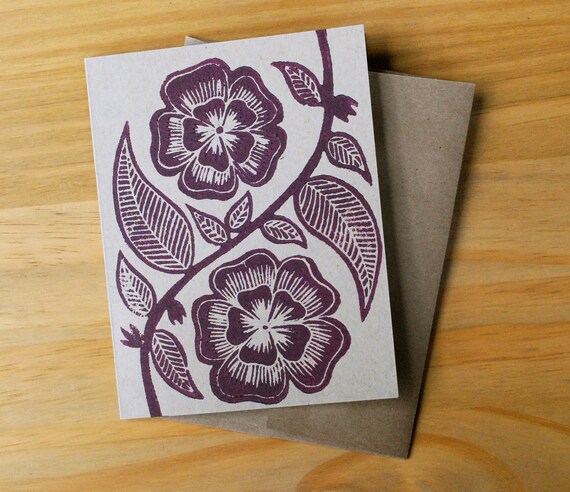
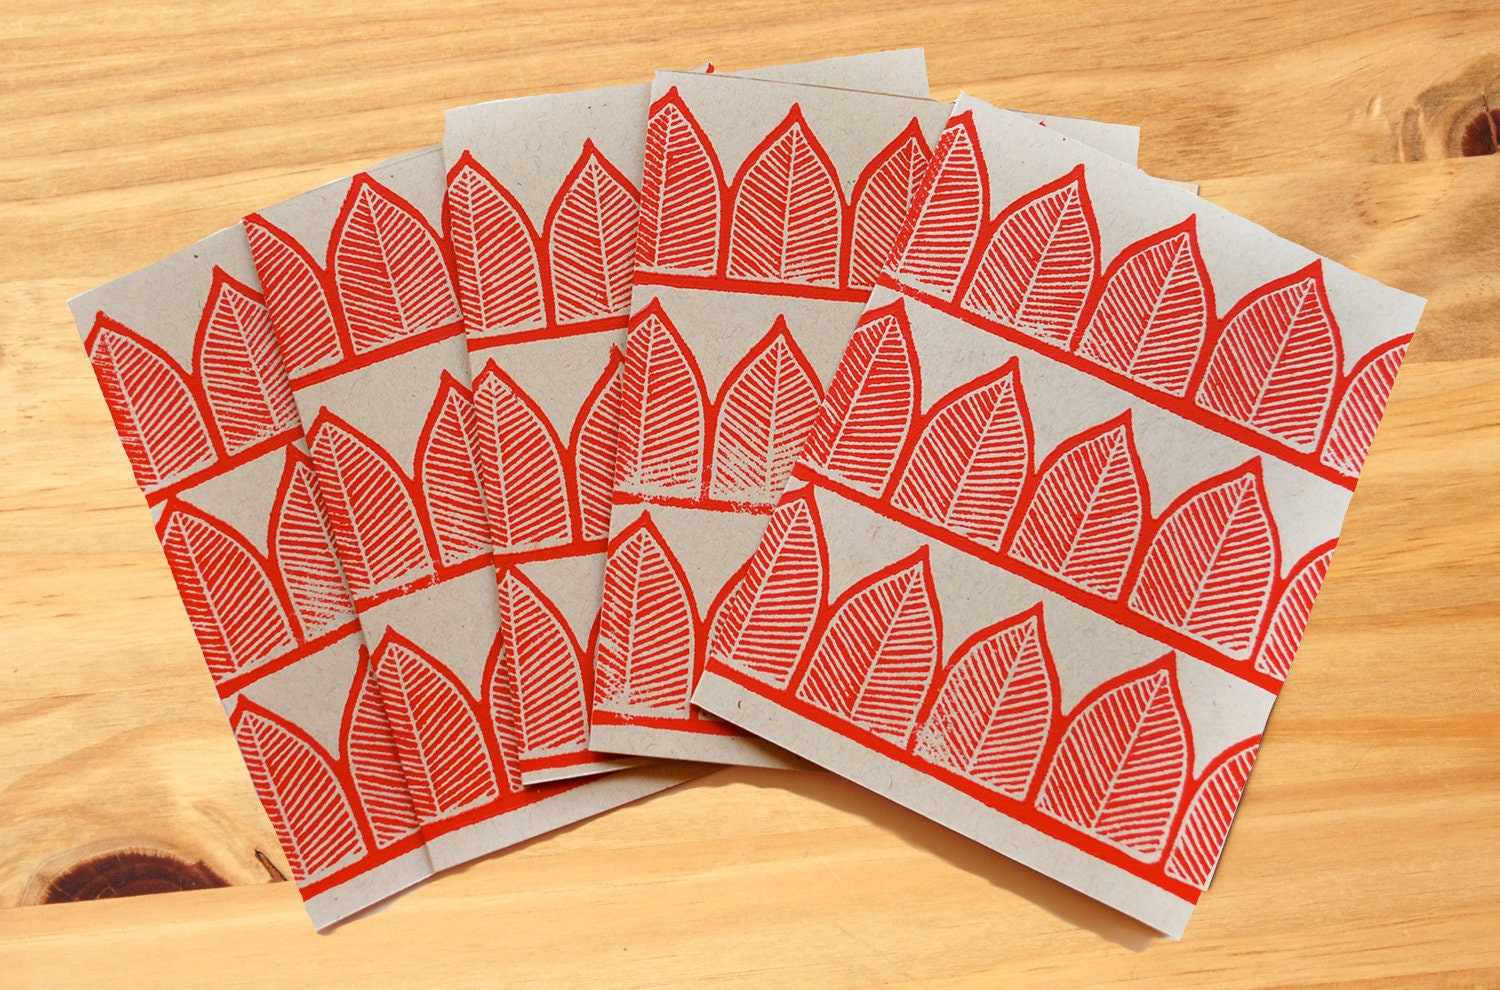
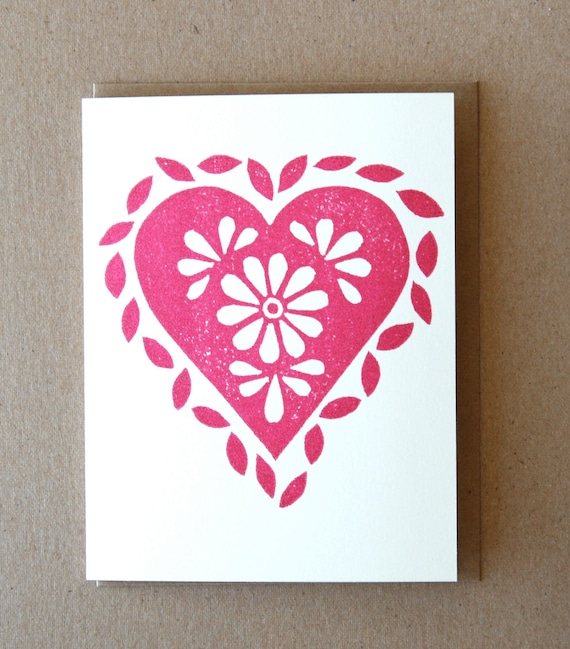
Katharine Watson creates these beautiful block printed cards, hand-carved on linoleum blocks with patterns inspired by India and Indian architecture.

I’ve recently become obsessed with block printing and stamps and have picked up some blocks to experiment with. Business cards and greeting cards were on top of my list – perhaps you’ll get a block printed Christmas cards from me :)

Look at these lovely designs! I’d frame these or keep them in a hand-painted box to look at. And send a whole bunch out to people who appreciate this traditional art form, even with a contemporary twist.

Single Hand Block Printed Card and Envelope

On her Etsy shop, she’s got coasters, cards, monograms, scarves…

Five hand block printed cards

Single Hand Block Printed Card and Envelope

and a line of Christmas cards and coasters too.

And from me to you…

Thank you for being such sports! The encouragement I have received has been terrific and I’m looking forward to a more vibrant blog in 2013! Cheers!

See more of Katherine’s work here. Visit her blog (I’m going through every post now, to the detriment of impending deadlines…)

All images via Katherine Watson.

{More} Painted bottles

Now that I spotted some, I keep seeing unusual painted bottles everywhere! Here are some more ideas for you to DIY.

via
Hand Painted Butterfly Oil and Vinegar Bottles - Click Image to Close
via


via

via

Mail Art

Here’s a great reason to save all those envelopes once more (besides using as rough paper – you do that, don’t you?)

Mail Book

Made by the folks at Badbooks (love that name) this is a fabulous recycled gift that you can actually buy. You never know what stamps or paper you might find inside your book!

Each page is a former envelope. Some pages have plastic windows, some have dates etc. printed on. The cover is made from corrugated card.

Love the idea. Found here.

3 ideas to recycle old saris

One of my greatest passions is to find stores and ideas that give old fabric a new lease of life. Whether it is converting old saris into bags and jewellery or framing them to create unique art, there is a lot you can do with those piles of old clothes and moth-eaten (and too sentimental to throw away) clothes. From one of my pinterest boards, here are few ideas to try.

Turn your torn saris into delicate and unusual ribbons or gift-wrap

Pinned Image

Sari rope, anyone?

Pinned Image

And if you have tired of the traditional zari bordered recycled cushion, why not use a more modern print next time?

unusual zigzag sari!

Do you have other creative ideas to reuse old sari fabrics? See my Pinterest board here.

All images link to their original source.

{Guest Post} Refinishing Second-hand Furniture, Nautical Style

image

I’m delighted to have Tanya, of The Coral Cove on Frangipani Decor today. Tanya is a freelance writer and interior designer, specializing in nautical décor and she’s here with some interesting ideas on how to upcycle old furniture with a nautical theme. Thanks, Tanya!

For an inspiring nautical look, you can upcycle old or well-worn furniture to create a great new style for your home.  Whether repurposing old tables and chairs you have around the house or refinishing pieces you found at a flea market or second-hand shop, you can achieve a stunning new décor that is as sophisticated or as fun as you want it to be.  Here are some nautical refinishing projects that are easy to accomplish and easy on your pocket book, too.

image

Seascape Coffee Table

Materials:  coffee table with a flat surface, large old sailing print, decoupage paste, clear coat sealer, primer, navy blue paint, common household tools/items like scissors or sandpaper.

A coffee table with a scratched or marred surface is the perfect candidate for a decoupage project.  If your table has good bones, paint can cover a multitude of blemishes and will breathe new life into the piece.  If the scratches are deep, you may choose to fill them or buff them out before priming.  If you have self-priming navy blue paint, you can actually skip the priming step and get right to the colour!  A thorough paint job usually requires three coats, but with good paint you may be able to get away with two coats.  Choose a print that fits the surface of the table or one that fits within a border of the table top.  After the last coat of paint has dried, glue your print to the top with the decoupage paste.  Be sure to smooth away any bubbles--you want the paper to lay completely flat to achieve a professional look.  Finish the top with a clear coat sealer that won't yellow with age. 

The Captain's Dining Table and Chairs

Materials: dining room table, cane back chairs, paint or wood finish, primer, sealer, nautical fabric, staple gun, optional reupholstering items.

Cane back chairs with a simple square cushion seat are easy to refinish--especially for a first-time refinishing project.  If the cane back isn't broken, you're in luck; if the cane has breaks, it's a good idea to remove it and replace it with a cushion back that you can make yourself.  Depending on the quality of the wood, you may choose to enhance its natural beauty with a wood finish, giving it the rich look of a genuine captain's table.  On the other hand, if the tables and chairs require painting, choose a colour in the nautical palette like white, gunmetal blue, or deep navy blue.  Approach the painting just as you would for the coffee table described above.

Refinishing the chairs will provide a distinctive nautical look.  First, remove the seat and paint the chairs in the desired colour.  While the paint dries, remove the fabric on the seats and replace with a nautical colour--navy blue velvet, for instance.  You may have to replace the cushions before replacing the new fabric using a staple gun.  If you choose to replace the cane with a cushion, you must first find boards that will fit within the chair back's frame.  Cover this thin board with a thin layer of cushioning material (available at any well-stocked sewing or craft store) and cover that with your desired fabric--a contrasting pattern with lighthouses, for instance, may prove just the right look to finish off your set.

Salvage Projects

Materials:  Paint, primer, nails, common household tools

For furniture that is beyond help, consider breaking it down into salvageable parts--especially wood.  Wood boards can be refashioned into wonderful and one-of-a-kind furniture with a nautical theme.  A large old table top can be cut down into boards and reassembled to create a ladder bookcase reminiscent of old ships' deck ladders.  Thick boards can be remade into long benches such as those that sailor's would use to take their mess.  You can also remake old headboards to serve as a boat-shaped platform for a child's bed. 

Wrap-Up

You can give old and broken furniture a new life with a little creativity and elbow grease.  A nautical theme is a classic look that can be as sophisticated and luxurious as an admiral's cabin or as rustic as the lower deck where the humblest sailors once slept.  You can easily find inexpensive furniture at thrift stores or yard sales to practice on and browsing through design books will provide you with a treasure trove of ideas to adapt to your nautical theme.


Images courtesy The Coral Cove.

Related Posts Plugin for WordPress, Blogger...